The Call Flow Creator is an extension of the Easybell Cloud PBX. It enables users to create and configure complex call flow plans in a graphical user interface.
To do this, so-called modules with different functions are placed on a canvas and dragged and dropped to the desired positions. These modules are then linked by connectors, which define the conditions under which the respective paths are selected in the dial plan. An incoming call is guided through the process in this way. How to create and configure a call flow is explained in detail below.
It should generally be noted that call flows always require their own extension, which is used to assign the dial plans directly to a phone number or extension. If a call is forwarded by a call flow to another extension (e.g. by the “Call” module), the configurations of that extension are followed. If the extension itself has configured forwarding, the previous call flow loses control of the call. For this reason, extensions that are signaled via call flows should ideally not have any forwarding or other functions set up in their own account.
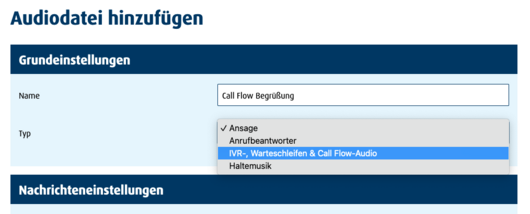
It should also be noted that all audio files used in the Call Flow Creator must be uploaded to the Cloud PBX as audio type “IVR, on hold & call flow audio”. Regardless of what purpose these files will fulfill in Call Flow.
An export/import function is implemented with which call flows of file type .json can be downloaded. These files can then be used as call flows in other CTA instances or other extensions. To do this, the file simply needs to be imported using the function. Module settings that may differ across different system configurations (e.g. statically configured agents in a queue) are reset to default values.
With regard to the configuration of the outgoing connectors, it should be noted that an unused standard output always causes a hang-up. This means, for example, that if the “Standard” connector is not otherwise configured after a “Call”, a call is ended immediately after hanging up. Unconfigured “Timeout” connectors result in the “Standard” connector also being used when a configured timeout is reached.
Extension configuration
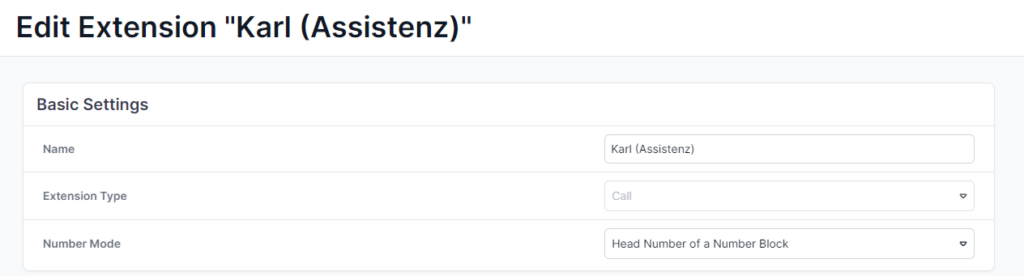
Step 1: Create extension
To access the Call Flow Creator, first create a new extension in your Cloud PBX. Please make sure to configure this with the extension type “Call Flow”. You should also define a unique name and the phone number mode.
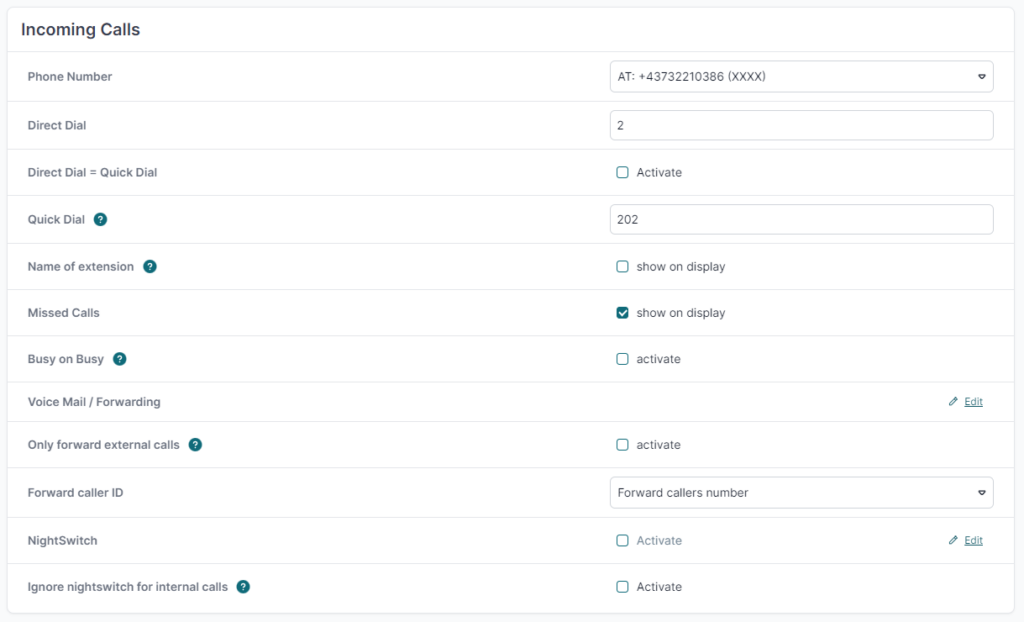
Step 2: Set incoming telephonie
In the “Incoming telephony” block, please select the connection to which the Call Flow should respond. To do this, select the number block and enter a corresponding extension. An internal speed dial must also be assigned, under which the Call Flow can be reached for internal calls.
Step 3: Open Call Flow Editor
Nun können Sie den Call Flow Editor öffnen, indem Sie unter “Call Flow” auf das Zahnrad klicken.

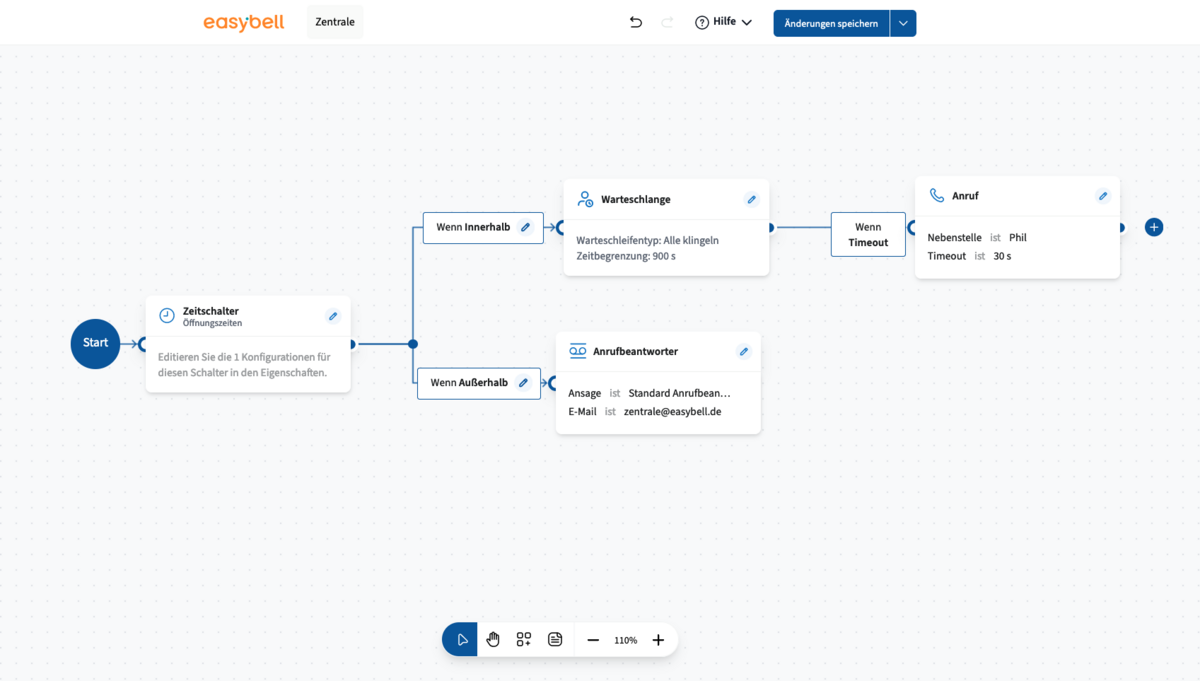
The Canvas
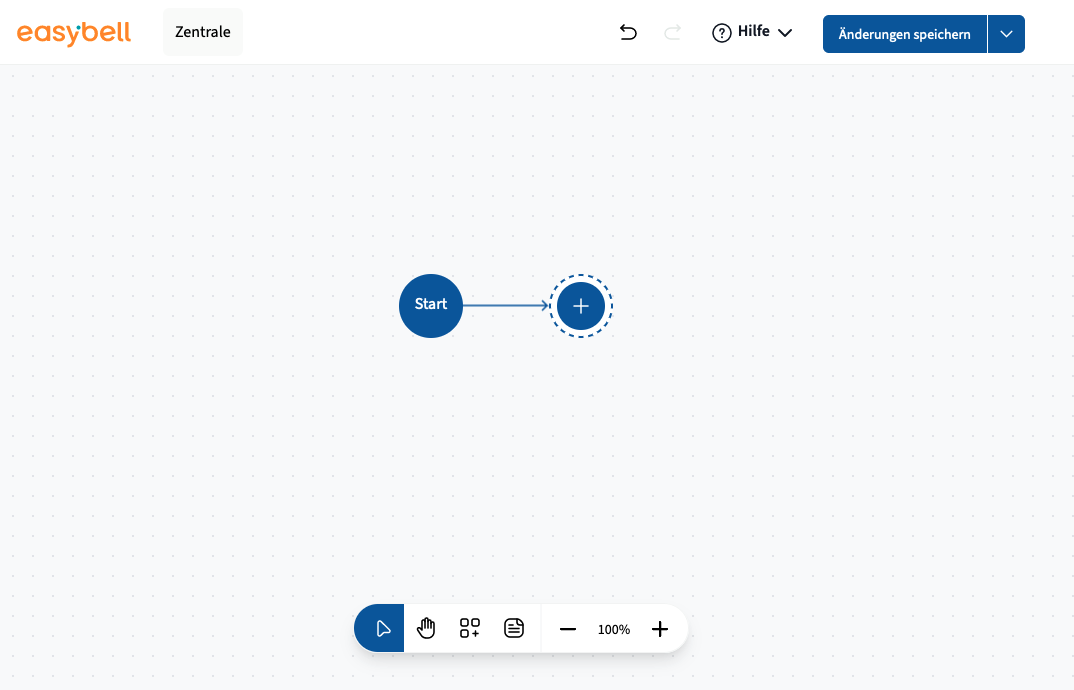
After clicking on the Call Flow cogwheel in the extension configuration, the Call Flow Creator workspace opens.
This is divided into different areas:
The Main Bar

The header bar contains various information and general functions. The name of the current call flow can be found here. You can also undo or redo steps that have been carried out. In the help area, you can enter our help center or contact Easybell Support. In addition, further tutorials can be carried out here, which explain frequently used call scenarios. You can also save, import and export call flows or clean up the desktop. The “Download function codes” function offers the option of downloading a list containing all function codes of the respective call flow that are important for manual telephone configuration. This provides the codes for manual switches and/or agent logins and logouts for each telephone.
The Toolbox

The toolbox contains the tools used to compile and process the call flows. Behind the symbols are:
Pointer: The pointer is used to place and edit objects on the workspace. Configuration points can be clicked on and then edited.
Hand: The hand is used to move the workspace itself. It is “grabbed” with a click and then aligned according to the desired workspace.
Modules: Click on the modules to open the module slideshow. The individual function modules can be selected here. In the slideshow, you can choose between an overview display and a more detailed display.
Notes: Provide the option for the administrator of the call flow to leave notes.
Zoom level: The view can be zoomed in or out on the workspace using the plus and minus buttons.
The modules

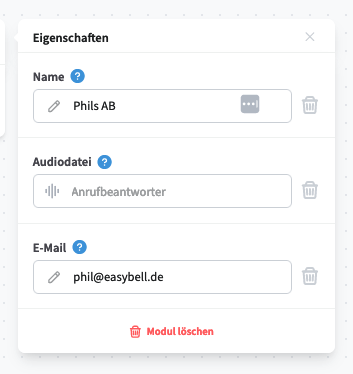
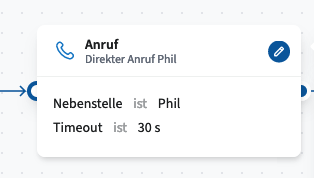
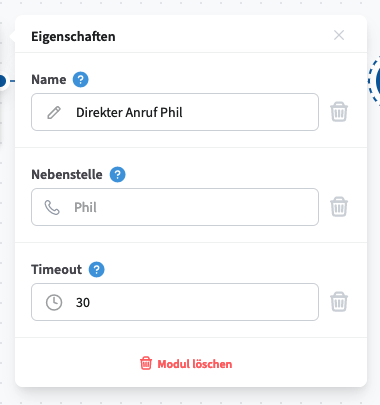
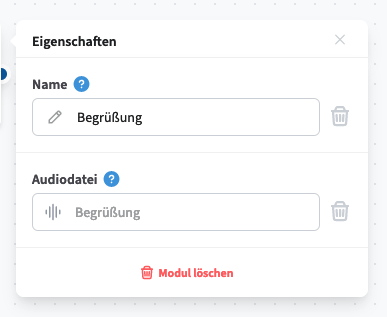
The modules are the individual functions that can be used in Call Flow. The “Edit” icon opens the detailed module properties. Depending on the module’s function, different attributes can/must be specified here. Each module offers the option of assigning a name, which is displayed in the header of the respective module. This can considerably simplify the clarity and ease of maintenance of a call flow.
The following modules are available for selection:
Call
Routes an incoming call to an extension that is selected from the drop-down menu in the settings. A timeout (in seconds) is also assigned. This defines how long the call is signaled on the extension until the next path in the call flow is used.
Outgoing connectors:
Standard: The call was accepted or actively rejected by the caller. The call was ended.
Timeout: The call was not answered, the configured timeout has been reached.
If no timeout is configured, the phone rings until the caller hangs up.
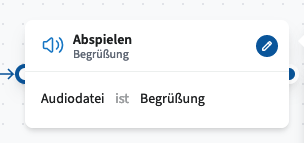
Play
When this module is reached, an audio file is played to the caller. The audio files can be selected from the pool of files that are managed in the cloud telephone system. All audio files of the type “IVR, waiting loops & call flow audio” are offered for the call flow.
- Standard: After the audio file has been played, the call is forwarded via this.
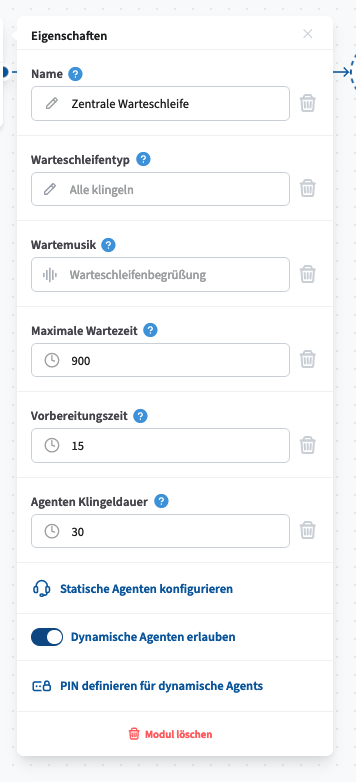
Calling queues
With the call queue module, the Call Flow Creator offers the option of using extended functions in a call queue. These are divided into seven configuration points:
Expand details on configuration points
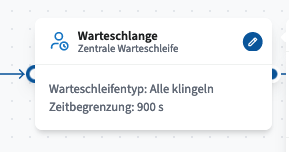
- Waiting loop type: The ringing scheme is configured here. The different schemes offered have the following functions:
- All ring: All agents are signaled simultaneously. The first agent to answer the caller takes the call.
- Longest time no call: Incoming calls are automatically assigned first to the agent who has been off the phone the longest.
- Fewest calls: The agent with the fewest calls is assigned new, incoming calls first.
- Random: Incoming calls are randomly routed to free agents.
- One after the other: A call is assigned to one agent after the other. The order of the list of static agents or the registration period for dynamic agents is taken into account.
- Music on hold: An individual music on hold can be configured here for each waiting loop. All audio files that are stored in the system with the type “IVR, queue & call flow audio” are offered.
- Maximum waiting time: This is the maximum time in seconds that a caller waits in the queue until the “Timeout” connector is used.
- Preparation time: This is the time in seconds that an agent has between hanging up a completed call and assigning the next waiting call. This setting only applies if a ringing scheme has been configured that enables “alternating” routing.
- Agent ring duration: The time in seconds that an agent is signaled before the call is transferred to the next agent. This setting only applies if a ringing scheme has been configured that enables “alternating” routing.
- Static agents: Telephones that are permanently assigned to this queue as agents are configured here. These agents cannot log on or off and are always included in the call distribution.
- Allow dynamic agents: This switch enables agents to log on and off dynamically. If activated, telephones can be directly assigned a function key with which they can then log in and out of the respective queue. These keys can be provisioned directly via the CTA in the telephone accounts. Alternatively, a list of possible function codes can be downloaded via the header so that these codes can be configured manually in telephones.
Outgoing connectors:
- Timeout: If the maximum waiting time has been reached, a caller is routed to the next call flow via this path.
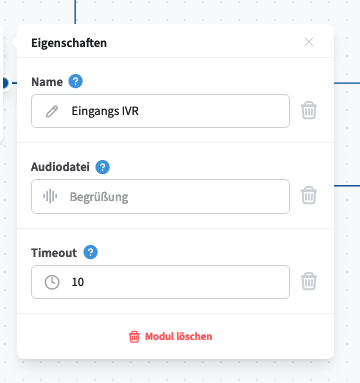
Press button
This module is the implementation of a classic voice menu. The caller can select various call forwarding options by pressing the number keys. To do this, an audio file must be selected from the pool of the Cloud PBX (audio file type “IVR, waiting loops & call flow audio”). A timeout must also be configured, within which a caller must make a selection. A further connector is available for undefined entries. The time of the timeout starts counting when the audio file has been played completely. However, a selection can already be made by the caller during playback.
Outgoing connectors:
- 0 – 9: Defines the number key with which the respective connector is selected.
- Timeout: If no input is recognized within the configured time, the call is forwarded through this connector.
- Invalid: If an input is detected for which no connector is configured, this path is followed.

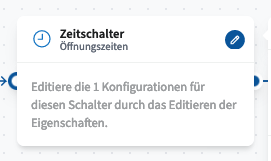
Timer switch
Used for time-controlled call switching. Several time periods can be configured with this module, which are then synchronized with the current time (time zone UTC+2). If the current time is within one or more of the time periods configured in the module, the corresponding connector is used. If this is not the case, a call is routed to the “outside” connector. To configure the time periods, simply create a new schedule and specify the start and end times as well as the desired days of the week.
Outgoing connectors:
- Within: Is used if the current time corresponds to one or more schedules.
- Outside: Calls that arrive outside the configured time are forwarded here.

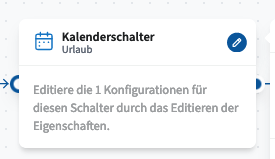
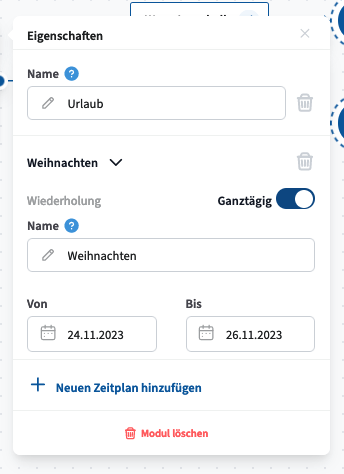
Calendar switch
Used for date-controlled call switching. In this module, calls are controlled depending on the respective date and time. By creating schedules, time periods can be defined in which alternative dialling plans apply. To do this, a start and end time is configured for a new schedule, as well as a date (or time period spanning several days). Calls received during this configuration are forwarded via the “inside” connector. Calls outside use the “outside” connector. You can also specify whether the configured days are to be considered for the whole day.
Outgoing connectors:
- Within: Is used if the date and possibly time correspond to one or more schedules.
- Outside: Calls that arrive outside the configured time periods are forwarded here.
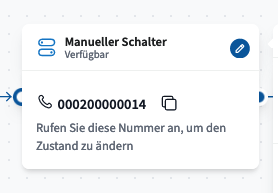
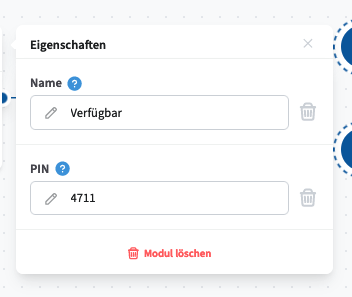
Manual switch
This module offers the option of configuring a function key on the telephones in the Cloud PBX, which can then be used to change the status of the respective module and switch between the outgoing connectors. The button on the telephone is illuminated according to the status. In this way, several telephones that have configured the respective button can monitor and change the status of this switch. Alternatively, a PIN can be assigned to prevent unauthorized switching. The function code that must be used for the respective module is displayed directly in the module and can be copied directly. In addition, auto-provisioning for supported telephones offers the option of provisioning a configured switch from a call flow directly to the telephone. The function codes are unique for each module so that several of these switches can be configured on one or more telephones. For manual configuration of the phones, the respective codes can be found on the list, which can be downloaded in the header bar of the Call Flow Editor.
Outgoing connectors:
- Active: This connector is used when the switch is active.
- Inactive: If the switch is inactive, this connector is used for forwarding.
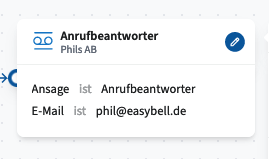
Voicemail
This module offers the option of forwarding a call to a voice mailbox. An audio file is first played to the caller. This can be selected from the audio files of the type “IVR, waiting loops & call flow audio” uploaded to the system. A message from the caller is recorded and converted into an audio file. This file is then sent by e-mail to an e-mail address that is also defined in the module.
Outgoing connectors:
- none